Pages

Tuesday, May 29, 2012

May - Spring Flowers

While my square foot vegetable garden is beginning to bare fruit, more flowers around my house are blooming each and every day. I guess the old adage, "April showers, bring May flowers", is mostly correct.  There wasn't much rain in April but there are May flowers.
Clematis 
Clematis
Rose Madame Isaac Pereire
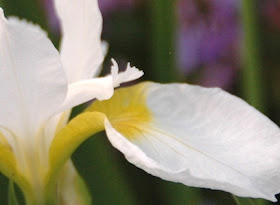
 Iris
Iris

Budding white Iris with Red Poppy in background
"Johnson's Blue" Cranesbill or Hardy Geranium
2 Sambucus Nigra "Black Lace" bushes in full bloom
The odor is lovely, spicy with a strong taste of licorice

©Damyon T. Verbo - all rights reserved


Monday, May 28, 2012

First Snow Pea Harvest

I picked some snow peas today. 


I love them when they are small, crisp, tender and sweet. Unlike the limp, tasteless monsters you get at the supermarket.


I didn't get many, 2oz/57g. They will be a welcome addition to a green salad.


Snow Pea Timeline


Seeds planted into the garden on 4 April


Snow pea plants 2"/50mm tall on 2 May


Snow pea plants 6"/152mm on 16 May


Snow peas 12"/305mm tall and flowering on 20 May

First harvest of snow peas 27 May


©Damyon T. Verbo - all rights reserved


Sunday, May 27, 2012

Square Foot Garden Yield 2012

In order to quantify the production of my square foot garden, I will be weighing all the produce that is harvested over this growing season.


Available at Harbor Freight
I will be using a digital kitchen scale to do the weighing.


I saw some snow peas forming on the vines at 20:00 on Thurs., 24May. I was unable to capture any good quality images at that time because of the low natural light level.


I grabbed the above images the next morning.


There are also cherry tomatoes and some bell peppers showing signs of fruit. My expectations are high, especially with the potato towers.


I will start to harvest the snow peas on Sun., 27May.


We shall see.


©Damyon T. Verbo - all rights reserved


Friday, May 25, 2012

Slug Takes The Bait

I have slugs in my square foot garden plot. Lots of slugs. I want to trap all the slugs before the lettuce becomes a slug target.


I made a slug trap and baited it with inexpensive beer. I used a small bowl, the size of a desert bowl from a school cafeteria. I dug into the soil a bit so the lip of the bowl was level with the surface of the soil. I then poured beer into the bowl almost to the lip of the bowl.


Below you can see one slug take the bait. It will take some time at the rate of one slug a day. 


I wonder where I can purchase party invitations, slug size.

The image is enlarged at least 3x. The original time lapse between exposures was one every 5sec. The replay speed is 2x.


©Damyon T. Verbo - all rights reserved


Tuesday, May 22, 2012

Transplanting Tomato Plants Into The Garden

Let's face it, starting seeds indoors is not an easy project. Although I have done it in the past, I didn't have the time this year or for the last five years, for that matter. So I, and a large majority of gardeners, will purchase plants to transplant into their gardens. This post will deal with transplanting tomatoes.


Here are two tomato plants I purchased at Lowe's on sale in late April at 2/$3.00. They are Bonnie Plants brand. These are both cherry/grape size tomatoes that I am planting in the top of my two potato towers. 

To reiterate, I filled the potato towers with shredded autumn leaves that spent the winter atop my square foot garden plot. In early March I started to compost kitchen wasted into the pile of leaves. The leaves were partially composted when I added them to my square foot plot. The leaves that weren't used in the plot were placed directly into two towers made from wire fence material with cloth lining the towers to contain the leaves and potato plants. I also drove 1/2"/12mm lengths of rebar into the ground to stabilize the towers. The towers were planted with potato seeds in layers  6"/ 15cm apart with the last layer 12"/30cm thick atop the last layer of potatoes. That last 12"/30cm will be where the cherry/grape tomatoes will grow.

Here is the top of the first tower I constructed. I created a well in the center of the shredded leaves and filled the well with some soil mix from last years hanging pots.

Remove all the last years plant remains and brake up any clumps of soil mix before placing the mix into the top of the tower.
Create a new well in the soil mix in which to place the tomato plant. One plant per tower.


Take a tomato plant in hand and remove it from its pot. The Bonnie Plants are in peat pots with a plastic label around the top. I cut off the label and removed the peat pot.

Bonnie Plants advertises the peat pots will decompose and are therefore more ecologically sound. Maybe so, however, the roots were pot-bound, as you can see in the above photograph. Leaving the roots in this condition will keep the roots growing in a circular pattern. That won't be good for the plant. That is why I remove the peat pots.


The roots need to be either unwound or if they are so intertwined, cut. New roots will grow once the plant is in its new soil.


Next I pinch off most of the lower branches of the plant. The reason is to place the plant deeper into the soil. Sunlight and air movement (read breeze here) will dry out the soil surface. Planting deeper allows the roots to keep moist because they are not near the surface of the soil that is likely to vary in moisture content.

Tomato plants are special when it comes to roots. All those hairy looking fibers growing straight out from the stem will become roots. The deeply planted stem will grow more roots from those hairy looking fibers allowing the plant to take in more moisture and with it, nutrients. Nutrients are good for plants as well as people.


By pinching off the lower stems I will plant the tomato at least 2"/50mm deeper.


Once the tomato is where you want it, fill in the depression with more planting mixture. Then it is important to water each and every transplant. Make sure the soil is moist through and through by burrowing down with your finger.

Clean up, for you are finished. Water each plant 1gal/3.78l per week, keep the weeds pulled and wait for those delicious tomatoes to turn red or yellow or striped or black ...

©Damyon T. Verbo - all rights reserved


Monday, May 21, 2012

Snow Peas Blooming

The snow peas began blooming on 19May. The plants have reached the top of the wire supports, which is 12"/30cm from the soil surface.

Images captured 20May2012


©Damyon T. Verbo - all rights reserved


Sunday, May 20, 2012

First Hummingbird Seen 19403

I was sitting on my patio Fri 18May towards nightfall, around 19:00, when I saw a hummingbird flitting about the honeysuckle. Of course, I didn't have my camera with me.


Hummingbird from a previous year in my neighbor's Campsis

That is the first one seen in 2012. I have only ever seen one at a time in or around my yard for the last three years. I hope I will see more than one at a time this year. Having my camera with me will be good, too.


©Damyon T. Verbo - all rights reserved


Saturday, May 19, 2012

Snow Peas Update

I planned to get the Snow Pea seeds into the ground on St. Patrick's Day, 17March, but that didn't happen. I planted the snow pea seeds 4April. Here is a review and update on the peas.


Snow Pea seeds ready for plastic sandwich bag 18March2012
4April2012

2May2012

14May2012
14May2012
The Snow Peas have grown to about 9"/23cm in 6 weeks. I do not see any flower buds. I expect harvest will be in June.


Even before the harvest I will be planting melon seeds in two squares and cucumber seeds in the other two squares in the back of the plot. That will probably happen very close to 1June.


©Damyon T. Verbo - all rights reserved