Showing posts with label Brinno. Show all posts

Saturday, December 22, 2012

Woodpeckers at Feeder

I placed a new store bought suet block in the bird feeder on December 2. 17 days later I saw a Red-Bellied Woodpecker at the feeder. I have never ever seen a Red-Bellied Woodpecker up close before. It is a beautiful animal.

What I think attracted the woodpecker was that new suet block. I purchased it at Lowe's along with shelled sunflower seeds that I use in the main hopper of the feeder. I like the shelled seeds because there are no shells blowing around the yard or being tracked into the house on damp shoe soles. I digress. 

I must confess. I didn't actually see the woodpecker with my own eyes. I captured photographs of it on my time lapse camera secured to the inside of my breakfast room window. The Brinno TLC 100 is held onto the window by Fat Gecko suction cup camera mount. Any reflections on the glass are because the camera is mounted inside the house. Last year it was mounted outside and there were no reflection. This year I am lazy. The batteries need to be changed everyday and I don't wish to go outside to do that.


Above you will see several clips of Downy Woodpeckers at the feeder throughout the day. Individual photographs were taken at 5 second intervals and are played back at 50% of full speed. All of the clips on this post were taken on 19 December 2012.

At one point a Downy Woodpecker is feeding at the same time as a squirrel. That is the only bird I have ever seen at the feeder with a squirrel. I think that bird is either brave or hungry.


LINKS
All About Birds - Red-Bellied Woodpecker
All About Birds - Downy Woodpecker
Lowe's Woodpecker Suet


©Damyon T. Verbo - all rights reserved


Saturday, October 13, 2012

Goldfinch Feeding on Nyjer Seeds October 2012

Early in October, goldfinch amassed at the two nyjer seed socks I have hanging near my breakfast room window. In the spring and summer, the goldfinch came to the same sock feeders. Then, they were very territorial and chased away other goldfinch as they landed on the feeders. In October, however, they all seemed to get along with very little signs of aggression.

The above video was taken with a Brinno TLC at one frame every 7 secs.

At 3:47 into the video, you can see as many as 12 finches on both socks at one time. All of them getting along, sharing.

Watching the finches feed on these sock feeders is very entertaining. I recommend everyone purchases at least one of these and enjoy watching.

©Damyon T. Verbo - all rights reserved


Thursday, February 23, 2012

Brinno TLC 100 - Formatting with a Mac

I finally figured out how to format my Brinno TLC 100 using a Mac.  Let me explain.


1. Connect the flash drive to the Mac
2. Open Disk Utility.app
3. Chose the Brinno drive
4. Chose Erase from the Disk Utility.app tool bar
5. Click on the Erase button on the lower left of the window making sure the Format is MS-DOS (FAT)

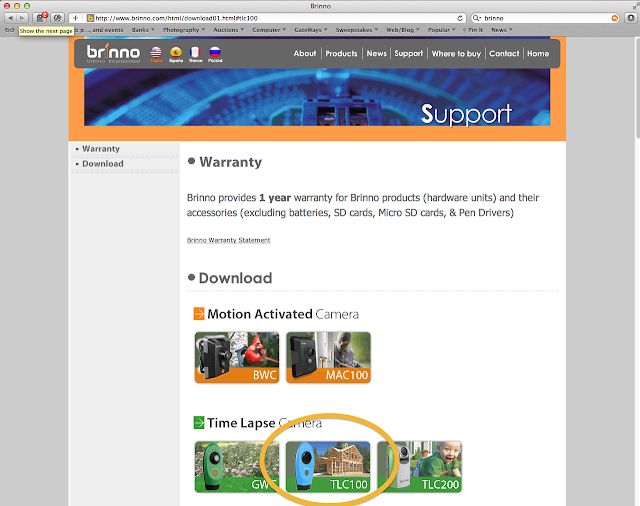
6. Go to the Brinno website
7. Chose Support Page
8. Choose the TLC 100
9. Choose the Setup TLC and download files

10. Place the downloaded files in a place that is easily remembered on your Mac, name the folder Brinno to be able to search for it
11. Then drag the contents of that folder to the flash drive
12. Eject the flash drive and you are set to place it into the TLC 100 and start capturing images


©Damyon T. Verbo - all rights reserved


Thursday, February 16, 2012

Brinno - Bird Feeder 15Feb2012

I was able to get the Brinno TLC 100 to work.  I downloaded the .exe file from the Brinno website on the Support page and dragged that, without any changes made in WinOnX, into the flash drive.  Then inserted the flash drive into the TLC 100.  It must have been the changes I made to the app in WinOnX that caused it to  malfunction once in the camera.  I am still not able to change the date or time stamp, however.


I placed the camera outside and energized it today at 06:35 GMT-5hrs.  At 04:11 a squirrel make an appearance and stays until 04:19


At least I have the camera functioning.  I have the time lapse set at 5 second intervals.


Batteries are going to cost me plenty through the summer.


©Damyon T. Verbo - all rights reserved


Brinno TLC 100 - Update

I refused to give in.  I formatted the flash drive in my iMac again.  I then dragged the two files I downloaded Brinno>Support>Setup TLC onto the flash drive.  Installed fresh AA batteries and the flash drive.  I turned on the TLC 100 and let it run facing my breakfast room table.  After a few hours I removed the flash drive and connected it to my iMac.  There in the drive was an .avi file.  I double clicked the file and Quicktime opened.  There on my iMac was a recording made by the TLC 100.  I am back in business.


©Damyon T. Verbo - all rights reserved


Tuesday, February 14, 2012

Brinno TLC 100

On 11 Jan 2012, USPS delivered to my home, one Brinno TLC 100.  I received the camera with the batteries and flash drive included.  I plugged the flash drive into the proper socket and properly installed the four AA batteries.  I wanted to change the interval between image capture to 7 seconds.  I could not.  The camera is programmed in Windows.  I do not have a Windows machine.  I settled on using the factory settings (7) to record time lapse images on the flash drive at 5 second intervals.
Today, all video formats are recognized by my iMac.  So I was not worried about being able to view the recorded time lapse file.  After one day of recording, I removed the flash drive from the TLC 100 and plugged it into my iMac.  QuicktimePlayer.app  opened and played the video fine.  It had captured several images of a squirrel poaching from the feeder.  Not what I had in mind when I put out a bird feeder but not unexpected, either.
I still wanted control of the camera time lapse.  In order to do that I would need access to Windows.  Ever since Apple began installing Intel processors in Macs, Windows can run natively on a Mac.  So I had several options to gain control of the camera program.
  1. Purchase an inexpensive computer that runs Windows
  2. Configure my iMac as a dual boot computer:Windows and Mac operating systems
  3. Install a virtual application to run Windows and OSX simultaneously 
Not wanting to spend an excessive amount of money and still get access to the Windows world, I opted for an app at the Apple app store, WinOnX.
I installed the app on my iMac.  I connected the flash drive to my iMac.  I double clicked the self extracting file and the window you see above opened.  
I then opened the TimeLapse Camera app.  The date and time signature were already changed when the app window opened.  I changed the time interval.  I was satisfied I was able to make the changes without making my computer a dual boot system and buying Windows 7.


I ejected the flash drive from my iMac, disconnected it and plugged it into the waiting TLC 100.  I took the camera outdoors and mounted it onto the external side of one of the windows in the breakfast room, so that the camera was about 20" from the bird feeder.  I then held the power button until the green light lit.  I backed away from the camera, out of its field of view, and waited to hear the double beep signal warning me the camera was energized and capturing images.  I returned to the house to let the camera do what it does, capture still images every seven seconds.


I returned the next morning to find the power light off.  I pressed and held the power button to turn off the unit.  Instead the light turned on and the signal beeped twice.  That meant the camera was already off when I arrived.  I held the power button again until it beeped three times signaling the power was off.


I removed the flash drive and connected it to my iMac.  There was no recorded .avi file.  None!  I figured something was wrong.  So I opened the Disk Utility. app on my iMac.


I seems that my dragging the recorded .avi file into the trash didn't erase the file and the drive was close to full.  Not having a way to format the drive in the camera, I decided to erase and reformat it using my iMac.


In the Disk Utility.app I pressed Erase after choosing the MS-DOS (FAT) format.  Once that was finished, I dragged and dropped the two files from the Brinno website for the TLC 100 into the reformatted flash drive.  Now the flash drive was mounted and there was 3.4 MB of data on the drive as seen below.


I ejected the flash drive and removed it from the iMac.  I plugged it into the TLC 100, installed fresh AA batteries, mounted the TLC 100 outdoors, pressed the power button until the green light lit and stepped out of its field of view and waited for the two beeps.  Once it beeped I returned to the house and let the camera do its thing until the morning.


In the morning I turn off the camera, pulled the flash drive and connected it to my iMac.  The camera again didn't capture any images.


I emailed the manufacturer in Taiwan explaining my problem.  I emailed the manufacturer twice and as of today I have still not received a reply.  So I emailed the company in California that sold me the camera.  The very next day I received a phone call from the California company.


It was explained to me the TLC 100 is not Mac compatible.  I figured that out on my own.  The person on the phone had no experience with Macs and could not help me.  He did inform me their new TLC 200 is Mac compatible and a raincoat is available to make it weather resistant.


So I have this new Brinno TLC 100 that will not record images on either of the two flash drives I have.  I have two flash drives I am unable to reformat.  I am contemplating purchasing a TLC 200 that has all of the controls in the camera.  Then I won't need to use Windows at all.


I wonder how long it would take for delivery?


©Damyon T. Verbo


Sunday, January 22, 2012

Bird Feeder Time Lapse Camera

I placed my new bird feeder, which I received as a Christmas present, outdoors by my breakfast room window at 13:00 Christmas Day.  For one week, I saw no activity at the feeder.  On New Years Day, I saw a squirrel eating my sunflower chips.  Damn squirrels!

There is no way I can sit and watch my feeder 24/7 or even just during daylight hours.  I needed an automated device to record the activity at the feeder.  I could have used my video camera from inside the window.   With the video camera, I would get a few hours of recording before the media filled to capacity or the batteries were expended.  That wasn't going to work.  I could purchase the hardware and software to allow my Nikon to capture images in a time lapse fashion.  That would be costly.  


I remembered seeing on the web somewhere, a programmable time lapse camera that is small, weather proof and under $150.00.   I did some research and purchased from Amazon a Brinno TLC 100 and a Fat Gecko Single Suction Cup Camera Mount, all for under $200.00.  I ordered both on a Friday and they arrived on Wednesday.


I opened the Brinno package and read the manual.  Windows operating system is needed to program the camera.  I only own Apple computers.  I have always only owned Macs.  My children own Macs.  Without Windows I was unable to change the application or the time stamp in the camera.  I would figure out something later.  For the present, I would only use the camera default time intervals and live with the wrong time stamp.


The camera was larger than I thought it would be.  From the images I saw online I thought it was 3" tall.  I made the above image to give you an idea of the size of the camera.  I have large hands.  If I stretch out my hand, from the tip of my small finger to the tip of my thumb is close to 10".  The actual dimensions of the camera are 3.66" x 7.55" x 2.08".
Included in the package were four Panasonic AA batteries and a 2GB USB flash drive.

The back of the TLC 100 has a locking mechanism that closes securely.  Once open, the batteries easily slipped into the appropriate holders.

It was time to choose the time intervals between exposures.  I originally chose time setting #2 or five minute intervals.  After one day of exposures I removed the flash drive and viewed the video.  I caught only two exposures of a squirrel.  That meant the squirrel was at the feeder more than five minutes but less than fifteen.  That was not enough exposures for me.  I changed the intervals to time setting #7 which is factory set at 5 seconds.
The flash drive is then inserted, the back is locked on and the camera is ready for service.

I didn't want the camera on a tripod inside the window for various reasons.  I purchased a camera mount with a suction cup to mount the camera outside to my breakfast room window.

The Brinno has a threaded socket to accept a standard 1/4-20 machine screw.  The Fat Gecko has a standard 1/4-20 stud to mount the camera.


I was now ready to place the camera outside on the window.  I cleaned the window to make the glass as smooth as possible for the best suction.
The suction cup was then placed on the glass and locked in position.  I adjusted the mount so the camera was pointed at the feeder and locked all the adjustable handles and locking rings.  I measured the distance from the camera to the feeder and placed the focus dial a the closest setting 20" - macro.


View from inside the breakfast room
I activated the power and the exposures began.


The above video was from Monday, 16 Jan 2012, three weeks to the day elapsed since I first hung the feeder.  Nothing happening in this time lapse video except wind blowing the feeder, the sun moving through the back yard and at elapsed time 0:57 through 1:00 one bird appears at the feeder.  It turns out to be a Junco.  A Junco that I stated earlier would never eat at this hanging feeder.  Mea culpa.  I would never have known this fact without the camera.


©Damyon T. Verbo - all rights reserved