Showing posts with label drip irrigation. Show all posts

Wednesday, April 16, 2014

Hades Releases Persephone

February 3, 2014 - 7.3"/185mm snow

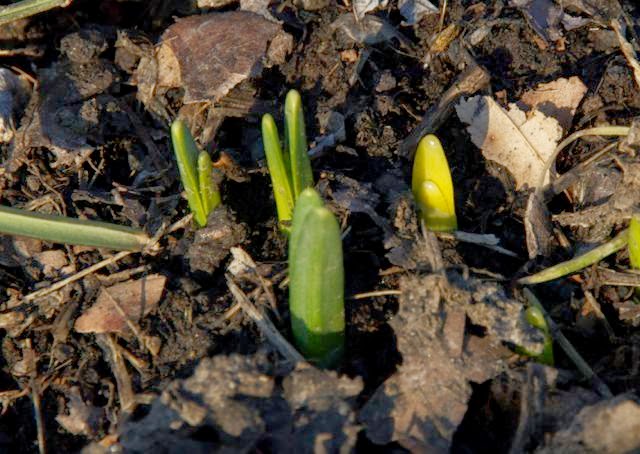
The winter has been rather harsh here. A great deal of snow was shoveled. Much more than normal. Temperatures were low into the first month of spring. But as Zeus commands Hades to release Persephone each spring, the earth awakes.


I began the growing season late again this year as last. The reason was one of mixed cold temperatures and malaise. I missed the sowing of peas and onions for the second year in a row. I do so love freshly picked snow peas. Not to worry. The temperature rose above 68ºF/20ºC this week. I feel planting fever coming on.

First action I took in the square foot garden was sprinkling two tablespoons of my organic fertilizer on each square foot section of both raised beds. Second action was to mixing it into the first inch or so of planting medium.


What you see in the photograph are the two of the four drip irrigation tubes I use to water the raised beds along with the fertilizer atop the growing medium.

Fertilizer mixed into the growing medium.


Third action was to cover both raised beds with red plastic mulch.
The mulch will server many purposes.
  1. Warm the soil
  2. Keep out any unwanted seeds
  3. Retain moisture
  4. Reflect light up under the leaves.
Persephone is only upon the earth for a short time. Don't just stand there, do something in your garden. 


I am already thinking of that first tomato.

©Damyon T. Verbo - all rights reserved


Sunday, May 19, 2013

Lazy Bed Potato Planting Method


Last year I grew potatoes in towers. The towers were constructed of wire fencing material rolled into columns. Each tower was lined with fabric and rebar was driven into the ground close to each tower for support.


6"/15cm of shredded leaves from the previous autumn were alternately layered in each tower with a layer of seed potatoes.


A 12"/30cm layer of growing medium was placed atop each tower into which was planted a grape/patio tomato. This proved to be a mistake. I was unable to harvest the potatoes when they were ready for harvest because the tomatoes were still producing.


Although, for the season, the grape tomatoes were productive(13.2 lbs/6.448k), I was disappointed with the potato production (2.11 lbs/1.031k).


This year I planted a few potatoes from the towers harvest of last year, combined with some sprouting potatoes from a bag of commercially grown potatoes found in my pantry. However, I used a different planting method.


I had a supply of sod I cut during the process of preparing the second raised bed site. This reminded me of a method of potato planting told to me by an Irishman who was raised in the Wicklow mountains outside Dublin, the Lazy Bed.

Basically, to make the lazy bed, potatoes are placed on the ground atop the grass. The sod next to the potatoes is dug up and flipped over onto the potatoes. Easy right? Sounded easy to me. Plus, I already had sod cut.


I chose a site close to my second raised bed. I decided to use the same footprint of my raised bed, 4'/1.21m square, for the lazy bed.


I placed four potatoes in a row, each 12"/30cm from each other. I also placed a drip irrigation tube in each row. The drippers are conveniently spaced 12"/30cm apart which made the potato spacing easy.

The previously cut sod was then placed atop the rows of potatoes.


The overturned sod was then covered with 4"/ 10cm of shredded leaves. The mulch of shredded leaves will retain moisture, provide food and allow ease of weeding. Plus I had to move the pile of leaves off my patio.

I hope the production of potatoes will increase with this method. Time will tell.

©Damyon T. Verbo - all rights reserved


Thursday, May 16, 2013

Drip Irrigation System Alteration

The initial installation of the drip irrigation system had one major drawback that needed to be altered.


The supply line bridged from one raised bed to the other about 10.5"/27cm above the ground. In order to walk between the beds I had to climb over the supply line. That created a tripping hazard. A hazard I didn't want to deal with day in and day out.

To rectify the situation I purchased 6-90º elbows to route the supply line down the face of the frame, across the ground, back up the adjacent frame and again down the opposite side of the second frame, continuing across the ground to the faucet.


Another project will be to get some wood chips from the township woodchip pile to cover the landscape cloth. That is, after I remove all the seeds that have fluttered down from the nuisance Norway maple trees. I am not sure which has a better survival instinct, the maples or dandelions


©Damyon T. Verbo - all rights reserved


Friday, May 10, 2013

Drip Watering System for Lazy Vegetable Gardening

I am, what I call, a lazy gardener. I don't mind working hard in the spring but when it gets hot, I get lazy. Therefore, I try to do as much work as I am able in the spring to sit back and enjoy the garden through the summer.

In the mail this week, I received the drip irrigation system for my raised beds. Over the past 7-8 years I have been using a 1/2"/ 13mm soaker hose cut to the needed length and joined together with regular garden hose using plastic fittings. However, last year the 1/2"/ 13mm fittings I need were no longer available on the market. Neither in the brick and mortar stores or on the internet. All the available fittings were 5/8"/ 16mm. My old system was not repairable, it was finished, kaput, done. I needed to move on to a new system.

 
From Lowe's, I purchased a Mr. Landscaper Drip Irrigation Vegetable Garden Kit. This is not a item my local Lowe's stocks. I had to make the purchase online at Lowes.com. Over a period of two weeks I experienced problems completing the purchase. Lowe's system just wouldn't complete the sale. I had to call their customer service number listed on the website. To make a long story short, the kit was purchased in Texas and sent via UPS. Way to go Lowe's.

The above tubing included in the kit is 1/4"/6mm inside diameter with one 1/2gal/1.9L per hour/ emitter spaced every 12"/30cm along the hose. This works perfectly with the square foot garden method I am using for these raised beds. How does it work perfectly, you ask? Let me explain.


Each raised bed in divided into 16 equal 1'/ 30cm squares.

                                       
Four 4' lengths of emitter tubing, each with four emitters spaced 12" apart are placed on the bed 12" apart. Thereby having one emitter for each sq ft space. On average over the growing season, each sq ft space will need 1gal of water per week. By isolating the water supply to this drip system for two hours per week, the plants will obtain their needed gal/wk.

I started by installing the emitter tubing, opposite of the manufacturer's installation instructions. I cut the end of the tube 6"/15cm from the first emitter. Starting at one side of the raised bed this measurement placed all the emitters in the center of each delineated sq ft area.


Since I had the plastic mulch already atop the raised bed, I needed to thread the tubing under the plastic. To keep out any foreign matter from the hose, which might stop the water flow, I placed a plug into the leading end of the tube.
If you look closely you can see the leading end on the left side of the photograph as I feed the tube under the plastic. If the end wasn't plugged there would undoubtable be some foreign matter in the tube.

Above you can see the tubing exiting at the next plant. Continue feeding the tubing through until you reach the other side of the bed.


I was able to uncover the surface of the bed to place this row of tubing rather than fishing it under the plastic. Much easier doing it that way.


The next step was to pierce the 1/2"/13mm supply tube. 

Insert a connector and push the end of the emitter tubing onto the connector. Do the same for all four of the emitter tubings.

You will notice in the above photograph, the supply tubing tends to keep its curved shape from all the time it spent coiled in the packaging. That needed to be addressed, next.

I found the above items in my garage. Plastic pipe strapping, hex washer headed sheet metal screws and a magnetic socket to drive the screws. I had both phillips headed and these hex headed screws. I chose the hex screws because I knew the screws would rust outdoors even thought they were coated. The hex headed screws would be easier to remove once the rust got to the screws.

I cut the strap so there were three holes to each length. I chose the length after conforming the strap over the black supply line. 

I placed one strap/clamp on each end of the raised bed frame which left some curve in the supply line near the center of the frame.


To take out that hump in the supply line I added another strap/clamp.


Some supply line needs to extent past the raised bed frame to use the double over clamp you see on the red plastic to the left of the pepper plant above. I am leaving the end of the supply line open until it is connected to the water supply. Just before installing the double over clamp on the end of the line water needs to be flushed through the tube to get out any foreign matter that might clog the tube.

Everything fit perfectly and I have more emitter tubing to extend the drip system to other parts of my garden. With the drip system, the plastic mulch and the raised beds, I am almost ready to a lazy season of vegetable gardening.


Monday, April 1, 2013

Behind In My Gardening

The weather has me behind schedule in my garden. Well, if I had a schedule, I would be behind.

There is a folk truism in this part of the world that says you plant onions and peas on St. Patrick's Day, March 17th. I didn't even have my garden ready for planting on St. Patrick's Day. I still don't have it ready and it is almost April.


This year I want to actually raise my square foot garden. I want to get some real drip irrigation with metered emitters, not the weeping hose I have been using. Plus I want to put down 1 mil plastic mulch over the drip system to try and eliminate weeding, increase soil temperature and retain moisture.


Ten days after the pea planting target date, I ordered online a 30'/ 9.1m roll of 1 mil red plastic mulch that is 4'/ 1.2m wide. I plan on making two 4' x 4' (1.2m x 1.2m) raised beds. So I should have enough mulch to cover both beds, almost completely, four times.


To get the order minimum up to $40 in order to use a discount coupon I received in the mail, I ordered some packets of Zinnias from W. Atlee Burpee. Burpee was a Philadelphia company that I remember visiting thirty-five years ago on Clarissa St. just NW of W. Hunting Park Ave. They are now in Bucks County, PA in Warminster, PA where you can still visit their store.


I love the ease of growing Zinnias. Beside their beauty, zinnias attract bees, butterflies and goldfinch love the mature seeds. All three creatures are a pleasant plus to the garden experience.

I hope my order ships really soon. In the mean time, I need to get some 2" x 12"/ 5cm x 30cm boards and a 2"x 4"/ 5cm x 20cm board or two for the corners of the bed frames and some exterior screws with which to fasten them.

Then there is the peat moss, vermiculite and perlite for the soilless growing medium.

The vegetable seeds to buy. 

The potato towers to erect.

The ...................................
..........................................................
............................................................................
............................................................................................
............................................................................................................

I love the growing season!

©Damyon T. Verbo - all rights reserved - Photographs from Burpee.com